Introduction
Homemade Cannoli are a timeless dessert that combines crisp pastry shells with a rich, creamy filling that feels both elegant and comforting. Making cannoli at home may seem intimidating at first, but with the right approach, it is surprisingly rewarding. I decided to try homemade cannoli after realizing how much fresher and more flavorful they taste compared to store-bought versions. The contrast between the crunchy shell and the smooth ricotta filling is what makes this dessert truly special. When prepared fresh, the shells stay crisp and the filling tastes light yet indulgent. This recipe focuses on classic flavors while keeping the process approachable for home bakers. Whether you are preparing them for a special celebration or simply treating yourself, Homemade Cannoli offer a bakery-quality dessert experience right from your own kitchen.
Print
Homemade Cannoli: A Classic Italian Pastry Made from Scratch
- Total Time: 1 hour
- Yield: 12 cannoli
- Diet: Vegetarian
Description
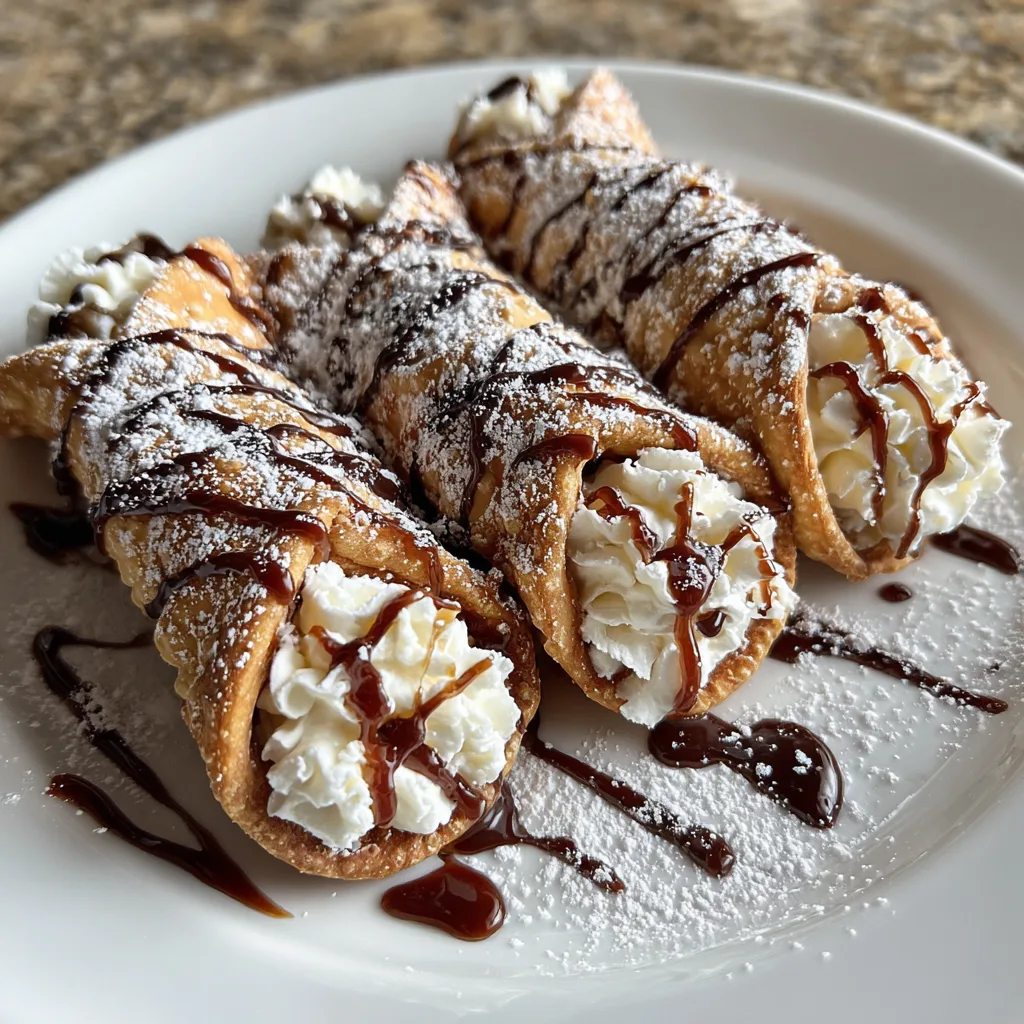
Classic Italian cannoli with crisp, golden shells filled with a sweet, creamy ricotta filling lightly flavored with vanilla and citrus.
Ingredients
- 2 cups all-purpose flour
- 1 tbsp granulated sugar
- 1/4 tsp salt
- 2 tbsp unsalted butter, softened
- 1 large egg yolk
- 1/2 cup dry white wine or milk
- Oil for frying
- 2 cups ricotta cheese, well-drained
- 3/4 cup powdered sugar
- 1 tsp vanilla extract
- 1/2 tsp orange zest
- 1/3 cup mini chocolate chips
Instructions
- In a bowl, mix flour, granulated sugar, and salt.
- Add butter and egg yolk, then gradually mix in wine or milk to form a dough.
- Knead until smooth, wrap, and rest for 30 minutes.
- Roll dough thin, cut into circles, and wrap around cannoli molds.
- Heat oil to 350°F (175°C) and fry shells until golden and crisp.
- Drain and cool completely before removing molds.
- In a bowl, mix ricotta, powdered sugar, vanilla, and orange zest until smooth.
- Fold in chocolate chips.
- Pipe filling into cooled shells just before serving.
Notes
- Drain ricotta overnight for best texture.
- Fill shells just before serving to keep them crisp.
- Dust ends with powdered sugar or chopped pistachios if desired.
- Prep Time: 40 minutes
- Cook Time: 20 minutes
- Category: Dessert
- Method: Frying
- Cuisine: Italian
Why You’ll Love This Recipe
This recipe delivers authentic texture and flavor with simple ingredients. The shells are crisp and delicate, while the filling is creamy and lightly sweetened. It is a make-ahead friendly dessert that always impresses.
Ingredients
(Tip: You can find the complete list of ingredients and their measurements in the recipe card below.)
All-purpose flour forms the base of the cannoli shells, providing structure while keeping them light and crisp when fried.
Sugar adds subtle sweetness to the dough and balances the richness of the filling.
Butter contributes tenderness and flavor to the cannoli shells.
Egg binds the dough together and adds richness.
White wine or vinegar helps create a tender, blistered shell texture during frying.
Ricotta cheese is the heart of the filling. Well-drained ricotta ensures a thick, creamy consistency.
Powdered sugar sweetens the filling smoothly without graininess.
Vanilla extract enhances the flavor of the ricotta filling with warmth and depth.
Chocolate chips add texture and a classic flavor contrast to the creamy filling.
Oil is used for frying the cannoli shells to golden perfection.
Directions
Begin by preparing the dough for the cannoli shells. Combine flour and sugar, then work in the butter until the mixture resembles coarse crumbs. Add the egg and wine or vinegar, mixing until a smooth dough forms. Wrap and rest the dough before rolling it thin.
Roll out the dough and cut into circles. Wrap each circle around a cannoli mold, sealing the edges lightly. Fry the shells in hot oil until golden and crisp. Remove and cool completely before removing the molds.
For the filling, beat the ricotta until smooth, then mix in powdered sugar and vanilla. Fold in chocolate chips. Transfer the filling to a piping bag.
Once shells are fully cooled, pipe the filling into both ends of each shell. Serve immediately or dust lightly with powdered sugar before serving.
Equipment needed
Must-Have Tools to Get Rolling
Here’s what you’ll want to have on hand:
Silicone Spatula – Durable, heat-resistant silicone spatula perfect for mixing, scraping, and spreading. Gentle on non-stick cookware and easy to clean.
Large pot – You’ll need this to boil the whole cabbage head and soften the leaves.
large bowl –Spacious, durable large bowl ideal for mixing, serving, or food preparation. Made from sturdy material and easy to clean.
Sharp knife – For coring the cabbage and slicing out the thick stem in each leaf. A paring knife works best.
Mixing bowl – A big bowl makes it easier to combine your meat and rice filling evenly.
Cutting board – For prepping cabbage leaves and rolling them like a pro.
Full-Size Blender – is a powerful kitchen appliance for making smoothies, soups, and sauces in large batches.
3-in-1 Air Fryer – This versatile 3-in-1 air fryer offers Air Fry for healthier meals with less oil, Bake for bakery-quality desserts and treats, and Reheat to bring leftovers back to life with crispy, flavorful results
Servings and timing
This recipe makes approximately 10 to 12 cannoli. Preparation time is about 30 minutes, with 30 minutes of resting and frying time, making the total time around 1 hour.
Storage/reheating
Store unfilled shells at room temperature in an airtight container for up to two days. Store filling separately in the refrigerator for up to three days. Fill cannoli just before serving to maintain crispness.
Variations and Customizations
Homemade Cannoli are easy to customize. For a citrus note, add orange or lemon zest to the filling. Chopped pistachios or candied fruit can be folded in for texture and flavor.
You can dip the filled ends in melted chocolate or crushed nuts for a decorative finish. For a lighter filling, mix ricotta with mascarpone or whipped cream. Each variation keeps the traditional character while adding a personal touch.
Nutrition and Dietary Info
Cannoli are a rich dessert made with dairy and fried pastry, best enjoyed in moderation. Using part-skim ricotta slightly reduces richness while maintaining flavor.
Expert Tips & Customizations
Ricotta texture
Drain ricotta thoroughly for a thick, pipeable filling.
Shell crispness
Fry shells until deeply golden for the best crunch.
Filling timing
Always fill shells just before serving to avoid sogginess.
FAQs
Can I bake the shells instead of frying?
Frying is traditional and gives the best texture, but baking is possible with slightly less crisp results.
Why is my filling runny?
The ricotta may not have been drained enough.
Can I make the shells ahead of time?
Yes, shells can be made one to two days in advance.
What oil is best for frying?
Neutral oils such as vegetable or sunflower oil work best.
Can I freeze cannoli shells?
Yes, unfilled shells freeze well when sealed tightly.
Do I need cannoli molds?
They are recommended for proper shape and texture.
Can I use mascarpone instead of ricotta?
Yes, or use a blend for a richer filling.
How sweet should the filling be?
Adjust powdered sugar to taste.
Can I flavor the shells?
Yes, a touch of cinnamon or cocoa powder can be added.
Are cannoli served cold or room temperature?
They are best served slightly chilled or at cool room temperature.
Conclusion
Homemade Cannoli are a rewarding dessert that combines crisp texture with smooth, creamy filling. With a little preparation and care, this classic pastry can be recreated beautifully at home, delivering authentic flavor and a truly special dessert experience.
Hungry for more? Visit our website for full recipes and follow us on Pinterest for daily foodie inspo you’ll love to pin!